The 3D Graphics Production Pipeline
| ✅ Paper Type: Free Essay | ✅ Subject: Design |
| ✅ Wordcount: 2321 words | ✅ Published: 03 Nov 2020 |
Introduction
As humans that are constantly exposed to high quality images and computer graphics, we expect a high level of ‘real’-ness from 3D graphics. To achieve this hyper-realism there are many stages involved, called a 3D graphics production pipeline.
A 3D graphics production pipeline can be seen as an assembly line of sorts, with different pieces of the final asset assembled piece-by-piece by teams of different people.
A production pipeline can be broken down into pre-production, production and post-production. Each stage involves several different steps. A production team often progresses sequentially through these stages, but a good pipeline should be flexible enough to allow for iterations and tweaks, if needed, throughout the project.
Pre-Production
Preproduction is the planning and designing stage of the pipeline. This stage is necessary as it lays the groundwork for the entire project and enables the management and artists to manage the pipeline, in terms of assets and financial capabilities.
Preproduction is usually the longest part of a project as it requires an understanding of the project aim. This stage is where the research of the subject matter takes place to have it consistent with the real-life object or an objects behaviour in certain conditions (Beane, 2012).
There are 5 components to a preproduction stage: Idea/Story, Script/Screenplay, Storyboard, Animatic and Design.
1. Idea/Story
The first step in any production is to come up with the idea of the product. This idea can often come from nowhere in particular and at any time. This is where you can get creative and come up with lots of different ideas. There is a lot of trial and error in this stage. To quote Andy Beane, “You must be willing to kill your babies[ideas] at any time.” This is to stop a fixation on one idea. If the idea is not good enough, you must be able to stop and bin that idea (Beane, 2012).
When you have settled on an idea that you feel could work, you then turn it into a story. This will be a rough outline of the narrative arc and what message you want your animation/graphic to tell. Creators must create a story, regardless of the project, that will captivate consumers.
2. Script/Screenplay
The script will detail all the onscreen movements, actions, dialogue etc. This will help people on various stages of the production pipeline to understand where objects are going to be places, their movements and any sounds that will be in the animation.
3. Storyboard
A storyboard contains thumbnail sketches of a scene, typically with camera shots, lighting, camera movement etc. This is more common for a 3D artist to use than a script as they tend to visualise things easier than writing them down. The storyboard is an important piece of the production pipeline as all levels of the team can see what is supposed to be happening on screen.
4. Animatic
An animatic is essentially a moving version of the storyboard with temporary dialogue and sound effects to give the production team a sense of the pace of the animation. This is where the editors will look at the shots and movements and if they do not work well together, they will be edited here. In 3D animation, cutting shots or sequences is rarely done as it is too expensive, so those decisions are made in preproduction. That is why an animatic is very important to the artists and the higher-ups (Beane, 2012).
5. Design
This is where the overall look of the project is decided. It’s at this stage that concept art for characters, objects and backgrounds is created by concept artists. A concept artist will create concept art that will display the mood that is required for the project (Beane, 2012).

The artist will create a turnaround, environmental sketch/design and these will be passed on to appropriate artists/modellers.
Production
If the preproduction stage is carried out well, then the production stage will go smoother. The output from the preproduction stage is handed over to the artists in the production stage and they will work simultaneously on the different assets required.
The production stage contains various components such as Layout, Modelling, Texturing, Rigging, Animation, VFX, Lighting and Rendering.
Layout
The process in layout is essentially turning a 2D animatic into a 3D layout. This layout will give the objects/scenes perspective, depth and scale that may be missing in the 2D version. Also, camera shots can be tested in a way that isn’t possible on the 2D version.
The layout will be a reference to every other stage in production and will be continuously updated throughout it (Beane, 2012).
Modelling
Modelling is the process of creating meshes that are a representation of physical objects. A mesh is made up of vertices, edges and faces, which are elements of polygons. These polygons together can form 3D surfaces which can be manipulated to create the desired object.
An alternative to polygons is Non-Uniform Rational B-Splines (NURBs) which are used when very accurate meshes are needed. They are formed using control points, isoparms and surfaces. NURBs are often used for more highly engineered projects that require more accuracy (Hix, 2016).
For a 3D animation production, the modeller will refer to the 3D Layout, concept sketches and any other assets passed from the pre-production stage. The modeller will add finer details to make it look realistic, to a certain extent.
Texturing
Texturing is where a 3D artist applies different colours and surface to a modelling asset to make it look more like the concept art. The asset arrives from the 3D Modeller (or it could be the same artist) as a flat colour such as grey.
When the texture artist has received the model, they must first make a UV map of the model. This is 2D image surface area of the 3D asset. This UV map is then painted and shaded to make the material look like what the real-life version of it would. This 2D image is then wrapped back around the 3D asset (Adib, 2019).
Rigging
Rigging is the process of inserting a control rig that enables movement into a static geometric object. Every object that you would want to move will require a control system. The control rig can be simple (parent/child relationships) or complex (joints, skinning, muscles, controllers). Regardless of whether the rig is simple or complex, it needs to be done correctly and effectively to make life easier for the animator that will receive the asset next (Beane, 2012).
Animation
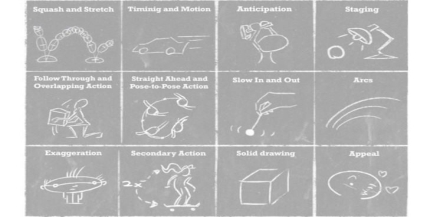
Figure 1: 12 Principles of Animation (National Film and Television School, n.d.)
There are three main ways to animate within 3D animation; keyframing, motion capture and procedural
1. Keyframing
The animator can manipulate an object by altering its position, rotation and scale, to name some at a keyframe. The animator then moves along a timeline to another keyframe and changes an element(s). The application then assumes the in-between frames and creates the movement.
2. Motion Capture
An actor’s movement are captured via cameras and a special suit and this is applied to the control rig of an object.
3. Procedural
The object is animated by executing code written by a programmer.
Animation is a very important aspect in the 3D graphics pipeline, as it can make or break a project. If the character is moving in an awkward way, that is the only thing that will be focused on.
VFX
The Visual Effects Artist animates everything else except for the characters and the objects they interact with. Software that the VFX artist will operate will work from maths and physics to mimic real world situations such as gravity and air. The VFX artist must have a basic level of maths and physics to make educated edits. VFX artists must have those logical/technical skills but must also have an artistic flare.
The VFX artist aim is not to have flashy effects, but rather to enhance the scene that they are applying those effects to (Beane, 2012).
Lighting/Rendering
Lighting makes a big difference to the realism of an object and it can drastically affect the mood and focus within a scene. Using the principles of light from photography, a 3D artist could mimic real life situations.
Artists could also use High Dynamic Range Images (HDRI) which is where multiple images are captured with different exposure settings. These images are combined, containing lighting data from the brightest and darkest areas of the scene. These HDRI’s provide accurate lighting and environmental reflections (Hix, 2016).
Rendering is where data from the scene is translated into images. The final render is influenced by how the other steps in production were executed. Each scene is rendered into many different layers (render passes) like backgrounds, foregrounds, highlights, shadows etc. This allows for fine tuning of individual assets.
Rendering can be completed in real-time or non-real time.
Real-time rendering is when the data can be rendered fast enough to display it in real-time. This works things like video games and media with interactivity.
Non-real time is when there is a high level of detail and more time for rendering is required. This is used more for film or animation where there are lots of assets (Adib, 2019). Therefore render-farms are sometimes used. A render farm is when one machine is used solely for rendering so there is less of a bottleneck within the production.
Post-Production
This stage is when the final output assets are created. If proper care was taken in preproduce to try to foresee problems, then this stage could go relatively smooth. If there are changes the postproduction team may try to make them.
This stage is made up of the following components; Compositing, VFX/Motion Graphics, Colour Correction and Final Output.
1. Compositing
This is a process where the render passes from the rendering stage are assembled again. More adjustments or extra images can also be added in at this stage.
2. VFX/Motion Graphics
This can sometimes be mixed into the compositing process. The artist who carries theses VFX and motion graphics can sometimes be the same person. They add simple effects to enhance scenes. Examples of such effects are dust, rain and camera shake. They can also create title sequences and other graphics for the production (Beane, 2012).
3. Colour Correction
Sometimes referred to as colour grading or colour timing, this process entails adjusting colour levels in each shot to ensure consistency throughout the project. This requires a high level of skill and a technical but creative mind. This is the last step of the production before exporting the files (Beane, 2012).
4. Final Output
An asset can be exported into many different formats. Each form has their own advantages and disadvantages, so naturally they have their own workflows. The most common type is digital video format. This format is more widely accessible due to its ability to be played on computers and online (Beane, 2012).
New Technology within 3D Animation Pipeline
The RE@CT project began in 2011, where a team of Peter Schubel, Jim Easterbrook, Graham Thomas, Oliver Grau, Alia Sheikh and Florian Schweiger aimed to revolutionise the production of realistic 3D characters.
The RE@CT project aimed to create film-quality interactive characters from 3D video capture of an actor’s performance, without the aid of tracking markers to allow for a much more natural and unhindered performance. This would create more lifelike results. This interactive feature means that the camera and 3D character animation could be controlled live by the user.
To capture this footage, a multi-cam setup is used. It involves 9 full HD cameras(1080p/25) on an evenly spaced rig, approximately 280 metres off the ground. This setup would be accompanied by 4 UHD cameras(2160p/50) at chest height in the four corners of a room. A python-based capture system, with synchronised video streams would capture the footage. The algorithm would then analyse the actor’s silhouette and assign texture coordinates to the resulting 3D mesh.

Paired with a head mounted capture system and a 360 Degree setup of seven DSLR stereo pairs, this process can capture highly detailed forms. An example of some of the facial features this setup can capture is shown in Fig 2 below.
Figure 2: Head Model rendered with different facial expressions (European Framework 7 , 2015)
This technology was used in an augmented reality game called Les Seigneurs de Montfort. It rendered 3D produced characters produced with RE@CT. The animations weren’t just of characters walking either, they were more interactive in a way that the characters took part in sword fights and interacted with each other.
RE@CT worked with BBC on their iWonder projects such as an interactive ballerina video(react ballet) that contains elements of the RE@CT methodology (European Framework 7 , 2015).
Conclusion
A pipeline is a complex set of tasks and not every pipeline will be the same. There could be changes that would make you have to repeat a step again or add something in. It brings together groups of specialists from different areas and they work together to complete a final output. They all play a part in the making of a 3D Graphic.
I would personally love to be a fly on the wall at various stages of the production, just to see how things would work in real life rather than reading about it.
References
- Adib, P., 2019. Getting to know 3D texturing in animation production. [Online]
Available at: https://dreamfarmstudios.com/blog/getting-to-know-3d-texturing-in-animation-production/
[Accessed 20 Feburary 2020]. - Adib, P., 2019. The Final step in 3D animation production 3D Rendering. [Online]
Available at: https://dreamfarmstudios.com/blog/the-final-step-in-3d-animation-production-3d-rendering/
[Accessed 20 Feburary 2020]. - Beane, A., 2012. In: 3D Animation Essentials. s.l.:Sybex, pp. 21-45.
- European Framework 7 , 2015. RE@CT: A NEW PRODUCTION PIPELINE FOR INTERACTIVE 3D CONTENT, s.l.: s.n.
- Hix, B., 2016. Making Sense of the 3D Production Pipeline. [Online]
Available at: http://www.blenderunleashed.com/tutorials/making-sense-of-the-3d-production-pipeline/
[Accessed 22 Febuary 2020]. - National Film and Television School, n.d. Principles of Animation – Explore Animation. [Online]
Available at: https://www.futurelearn.com/courses/explore-animation/0/steps/12228
[Accessed 23 Feburary 2020].
Cite This Work
To export a reference to this article please select a referencing stye below:
Related Services
View all


DMCA / Removal Request
If you are the original writer of this essay and no longer wish to have your work published on UKEssays.com then please click the following link to email our support team:
Request essay removal